Thank you for purchasing the Singular Motorsports Muffler Delete!
Your muffler delete comes with the following:
- Stainless steel turn-down tip
- Stainless steel hanger
- Gasket
- 2 x M12 Nuts
- 2 x M12 Bolts
- 2 x M8 Nuts
- 2 x M8 Bolts
- 2 x 1/2″ clamping tube collars
Tools Needed:
- 3mm allen key
- Sockets and wrenches in 12mm and 18mm sizes
- Socket wrench
- Torque wrench (ft-lbs)
- Spray bottle with soapy water
- Exhaust hanger removal tool (optional)
- You’ll also need wrenches and/or sockets to remove the existing hardware holding your old muffler to the midpipe. Depending on what midpipe and muffler you have, the hardware size can vary.
Step 1: Remove existing muffler
Start by unbolting the existing muffler from the midpipe. Then support the weight of the muffler and remove the muffler from the rubber hanger bushings under the trunk area. Some soap and water sprayed into the gaps where the metal rod passes through the rubber can help get them to slide off. Leave the two forward rubber hangers on the car (one on the left side, one on the right side) – your muffler delete will reuse those two rubber hangers. You can remove the two rearward rubber hangers from the car if you wish.
Step 2: Install the hanger
Install the new stainless steel hanger on the two forward rubber hangers under the trunk area, in the holes left open by the muffler that was removed. Again, a little soapy water helps things slide together easily. Do not lube the hanger rod with anything other than soapy water:
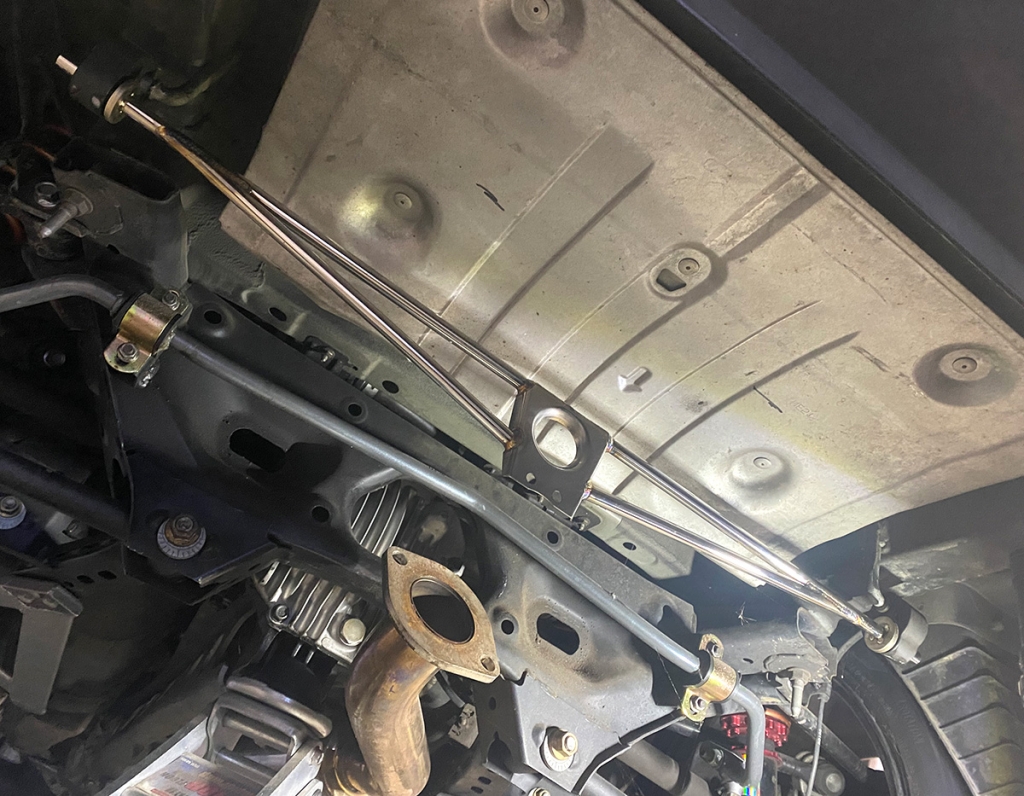
Ensure that the rubber bushings are pushed inwards towards the centerline of the vehicle as much as possible so they are pressed up against the stoppers on both the hanger rod attached to the car, as well as the stopper on the new stainless hanger. Adjust as needed so that both rubber hangers are nice and vertical and not twisted or aligned crooked:
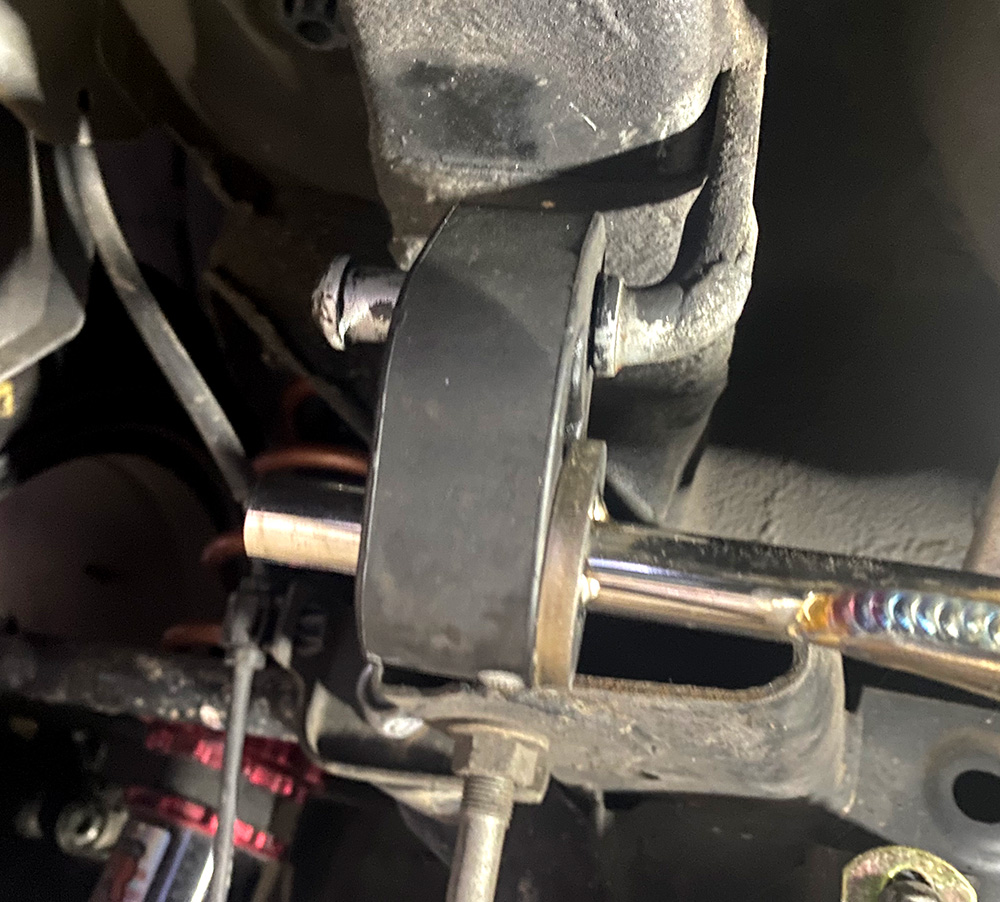
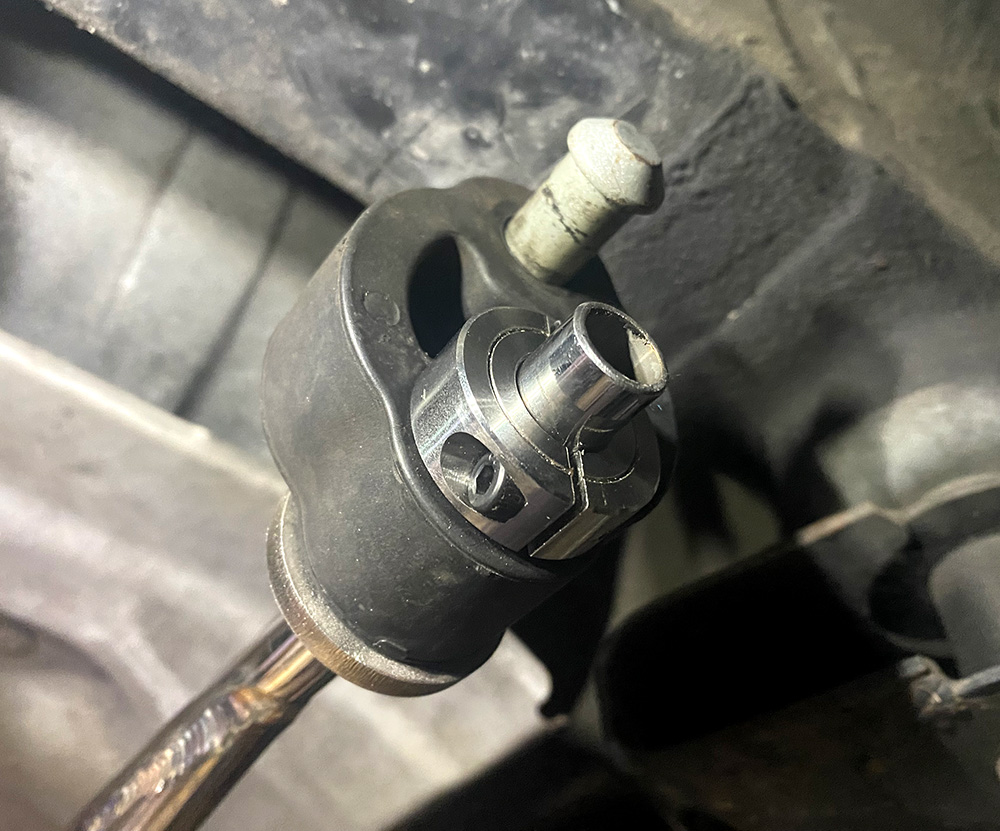
Install the clamping shaft collars on to the hanger rod on the outside of each rubber bushing. This locks the bushing in place and prevents the hanger from being able to pull out. Tighten the bolts evenly so there is an equal gap on each side of the clamp. These are small bolts so don’t overtighten them. They should be tightened with a small allen key until snug. This is a thing you do by feel. We hesitate to even give a torque spec for these bolts as a long torque wrench is really not appropriate for such a small bolt, but 54 inch-lbs (4.5 ft lbs) is more than enough:
Step 3: Install the turn-down tip
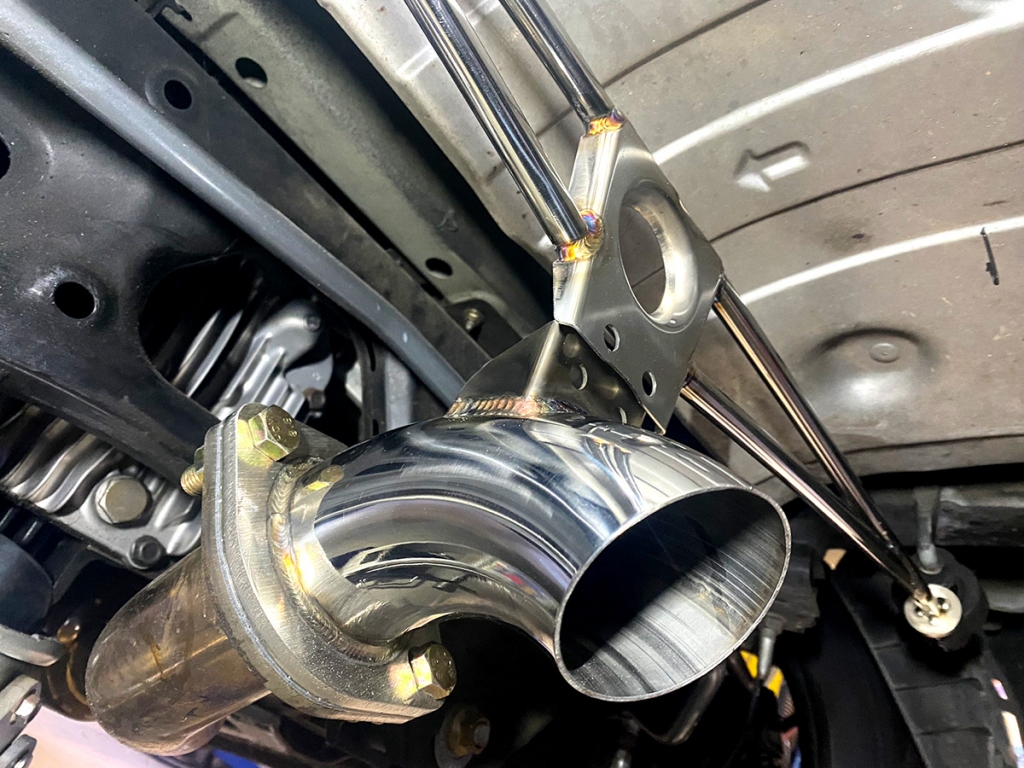
Install the turn-down tip on to the outlet of the midpipe. Use the provided gasket between the flanges here, and fasten the flanges together with the included M12 nuts and bolts. Ensure that the mounting tab on the exhaust tip sits under (towards the font of the car) the hanger’s mounting plate. Refer to picture below. Install the nuts and bolts loosely until just barely finger tight, then ensure that the gasket and the flanges are nicely centered on each other before tightening the bolts fully. Final torque is 35 ft-lbs.
Step 4: Connect the tip to the hanger
Position the exhaust tip so that the mounting holes align with the holes in the hanger. Install the two M8 nuts and bolts into those holes. Keep the weight of the exhaust supported until the nuts and bolts are tight to ensure proper alignment. Final torque is 25 ft-lbs.
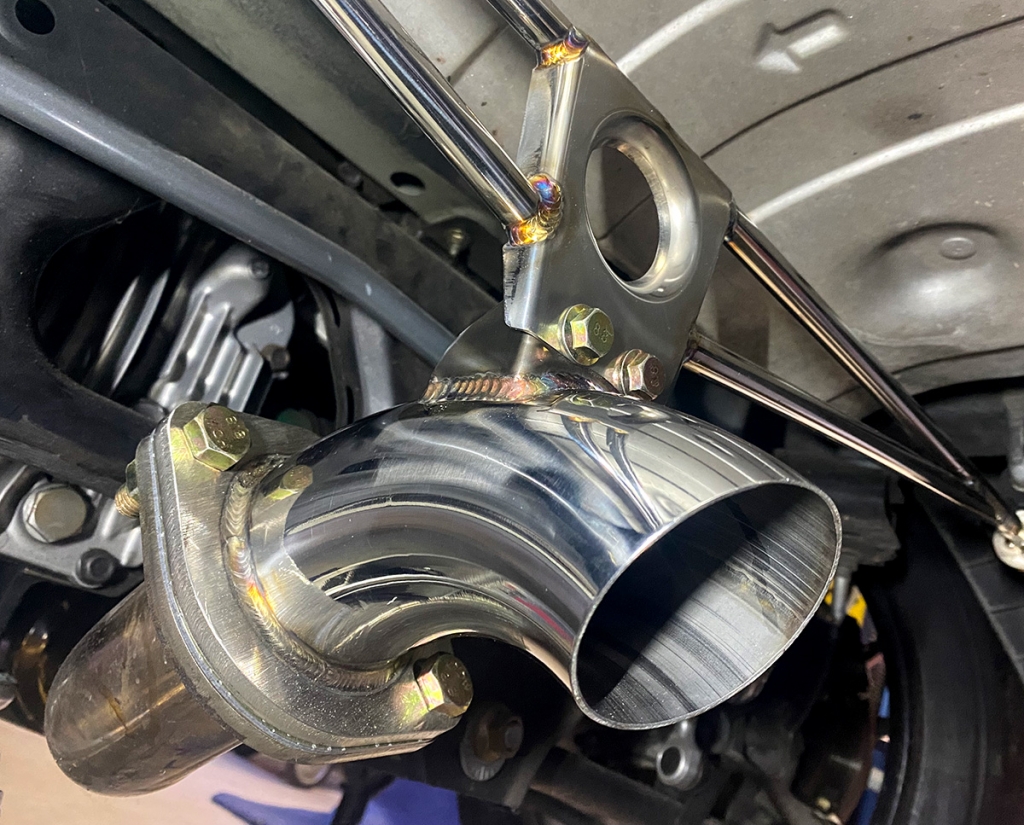
And you’re all finished! Thank you for purchasing our product and enjoy!
If you have any questions, reach out to us at support@singularmotorsports.com
